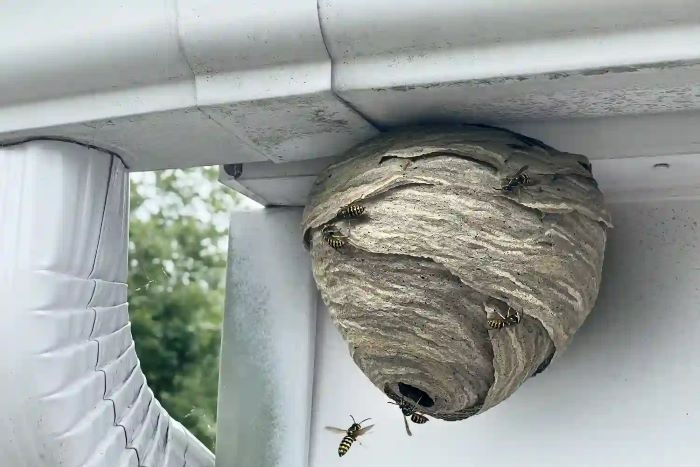
Wasp nests can pop up in inconvenient locations around your home or property. While your first instinct may be to knock it down, moving a wasp nest doesn’t have to involve killing the wasps. With some planning and protective equipment, you can relocate a ground nest to a safer spot away from high traffic areas. Here is a detailed guide on how to carefully move an active wasp nest without harming the wasps or getting stung.
Table of Contents
Assess the Nest

Before you move or remove a wasp nest, take time to observe and assess the situation. Pay attention to what type of wasps have built the nest, the size of the nest, the location, and how much activity is around the entrance.
Identify the species of wasp if possible. Some types like paper wasps tend to be more docile than yellowjackets and hornets, which can become very defensive. Larger nests with more comb built up indicate an established colony that has been there for awhile. New, small starter nests are easier to relocate than a huge nest that has been expanded over one or more seasons.
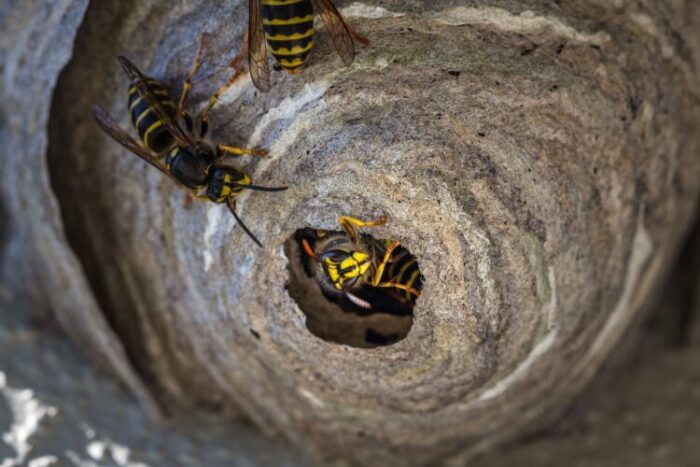
Also take note of the entrance and flight paths. How much coming and going do you observe? Early in the morning and at night are when there is less activity, making it safer for you to work around the nest during those times.
Gather Protective Gear
Your safety should be top priority when moving a wasp nest, so gather appropriate protective clothing and other gear ahead of time before you approach the nest:
- Beekeeper suit with veil
- Thick rubber gloves that cover forearms
- Duct tape to seal off openings
- Leather boots and pants
- Large trash bags
- Fish net or mesh screen
- Smoke or wasp spray (freeze type preferred)
- 5 gallon buckets
- Shovel
- Flashlight/headlamp if moving at night
The more of your body you can cover the better. Sealing off access points on clothing prevents wasps from getting trapped which could lead to stings. Prepare buckets for transporting cut-out nest sections during the move.
Choose a New Nesting Site
Before moving day, scout out a suitable location to rehang the relocated nest. Look for areas away from human activity but still favorable to wasp nesting needs:
- South-facing spots sheltered from wind and rain
- Eaves, roof overhangs, or abandoned sheds
- Trees or shrubs at least 15 feet from high traffic areas like doors
Having a new nesting site already selected will make the move faster and more successful once you begin cutting into the nest to remove it.
Prepare the New Nesting Site
To encourage the colony to accept the new nesting spot, set up a starter nest for them ahead of time. Take a paper grocery bag and crunch it up lengthwise into a narrow tube shape. Tie string in several places to hold the bag’s tube shape then attach it securely to the new nesting site before moving day. The starter nest gives them something familiar to build upon in their new home.
Move at Night
Plan to move the nest at night when wasp activity around the entrance is very low or nonexistent. This minimizes defensive behavior and stinging risks. Begin preparations as late evening approaches by sealing off possible gaps in your protective clothing with duct tape. Pull boots over pant legs and gloves over sleeves to prevent wasps from crawling inside.
Prepare Transport Containers
Have clean 5 gallon buckets ready with lids nearby. Later, cut sections of nest will be temporarily stored in covered buckets for transport to the new location. Line buckets with a trash bag for easier cleanup afterwards. The bags also prevent wasps from escaping during transport.
Spray Nest Exterior
Approach the wasp nest slowly under reddish light. Red light is less disruptive to nocturnal insects. Aim wasp spray or jetting smoke puffs at nest entrance holes and surrounding exterior surfaces to discourage wasp activity during removal. Continue spraying until no more wasps emerge then proceed with nest extraction steps.
Carefully Cut and Remove Nest
Use a sharp knife, scraper, or drywall saw to begin carefully cutting into the nest, removing one comb section at a time. Brush clinging wasps off into a container using the fish net or mesh screen. Place each cut-out chunk of nest comb into a prepared 5 gallon transport bucket lined with a trash bag.
Cover buckets securely after each chunk is added. This prevents captive wasps from escaping during transportation to the new site. Bring all buckets over to the staged relocation spot before opening to release the wasps.
Transfer Wasps to New Nest
Once at the new nesting site location, carefully pull back each bucket’s trash bag to expose the nest chunks while keeping the lid securely on. This allows the adult wasps to fly out and investigate their new habitat. After most wasps vacate, remove lids and set the cleaned out buckets aside.
Hang the Nest Chunks
Unwrap the nest chunk sections from the trash bags and securely hang them together onto the starter nest using hooks, wire, tape or other means to anchor them to the site. Group chunks close together, matching up comb patterns to reform the original nest shape as much as possible.
Let the wasps reorient themselves overnight and rebuild connections between the comb chunks. They’ll continue expanding the nest at the new location as the colony grows over the summer.
Post-Move Nest Cleanup
Back at the original nest site, clean up any remaining nest chunks, debris, or wasp stragglers. Soak the area with wasp spray then scrub down the surface thoroughly. Dispose of debris far away in tightly sealed trash bags. This eliminates pheromones and discourages wasps from restarting nest-building in the same location.
Monitor the New Nest
Keep an eye on the relocated wasp nest over the next few weeks. Refill sugar water traps or place fruit slices nearby to help support the recovering colony. If they fail to thrive at the site long term, remove and destroy the nest before a new queen emerges and disperses. Otherwise monitor annually and relocate again next season if necessary.
Avoid Exterminating Whenever Possible
With proper preparation and care, established wasp nests can successfully and humanely be transported away from residences to safer locations outdoors. This method allows the wasps—important predators of pest insects—to continue beneficial pollination roles in surrounding ecosystems. Therefore relocating nests should be the first approach before resorting to extermination.
When to Call a Professional
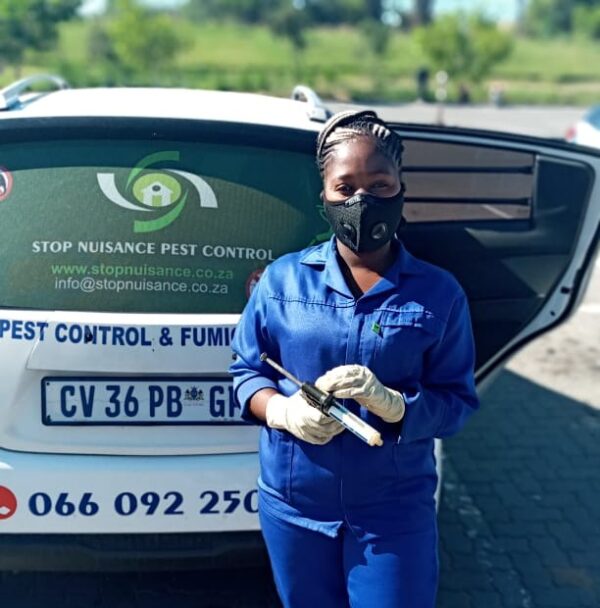
However large nests, especially those of more aggressive species like yellowjackets, may require calling in a professional pest control expert. They have commercial-grade protective gear and powerful pesticide sprays to remove infestations of hundreds or thousands of wasps. This is the best option if a nest is in a sensitive area like an attic or crawlspace where removal would be difficult or too hazardous for an amateur.
Stinging Insect Allergy Precautions
People with allergies to wasp or bee stings should refrain from removing nests themselves. An allergic reaction can quickly become serious and life threatening without immediate medical care. If you or someone you know experiences signs of anaphylaxis including swelling, hives, difficulty breathing, racing pulse, or dizziness after a sting, call emergency help right away. Carry emergency epinephrine if you have a known insect venom allergy.
Avoid Killing Beneficial Species
When encountering nests of native bees and pollinating wasps around your home landscape, consider leaving them in place if feasible. Protect nest sites by marking areas and rerouting foot paths and maintenance activities away from them. Their pollination services support backyard food webs, gardens, and ecosystems, so let these beneficial insects continue their nest cycles undisturbed.
In Conclusion
With proper planning, protective equipment, and technique, relocating an active wasp nest away from high traffic zones can be safe and successful for both humans and the beneficial wasps involved. Carefully boxing up nest sections at night when wasps are least active then hanging the reconstructed nest in a sheltered site gives the colony a chance to reestablish at a new location where their natural pest control abilities can keep helping gardens and landscapes thrive. So consider humane nest relocation steps first before resorting to extermination when encountered with a wasp nest around your property this season. I sincerely hope you find this “How Do You Move a Wasp Nest?” article helpful.

With over 5+ years of experience in pest control and a PhD in Entomology, our author brings a blend of scientific knowledge and practical expertise to Pestifier.com. Passionate about creating pest-free environments, they provide effective tips and strategies for managing and preventing pest infestations. Connect on Facebook for the latest updates and insights.

